Trophies and antlers have never been the objective for us when hunting, in fact, even when we have shot an animal with a decent rack, we’ve never done anything more than take the skull plate and toss the antlers into a tree or perhaps the garage. For us, it’s all about filling the freezer, enjoying nature and time with each other, and the satisfaction that comes with hard work.
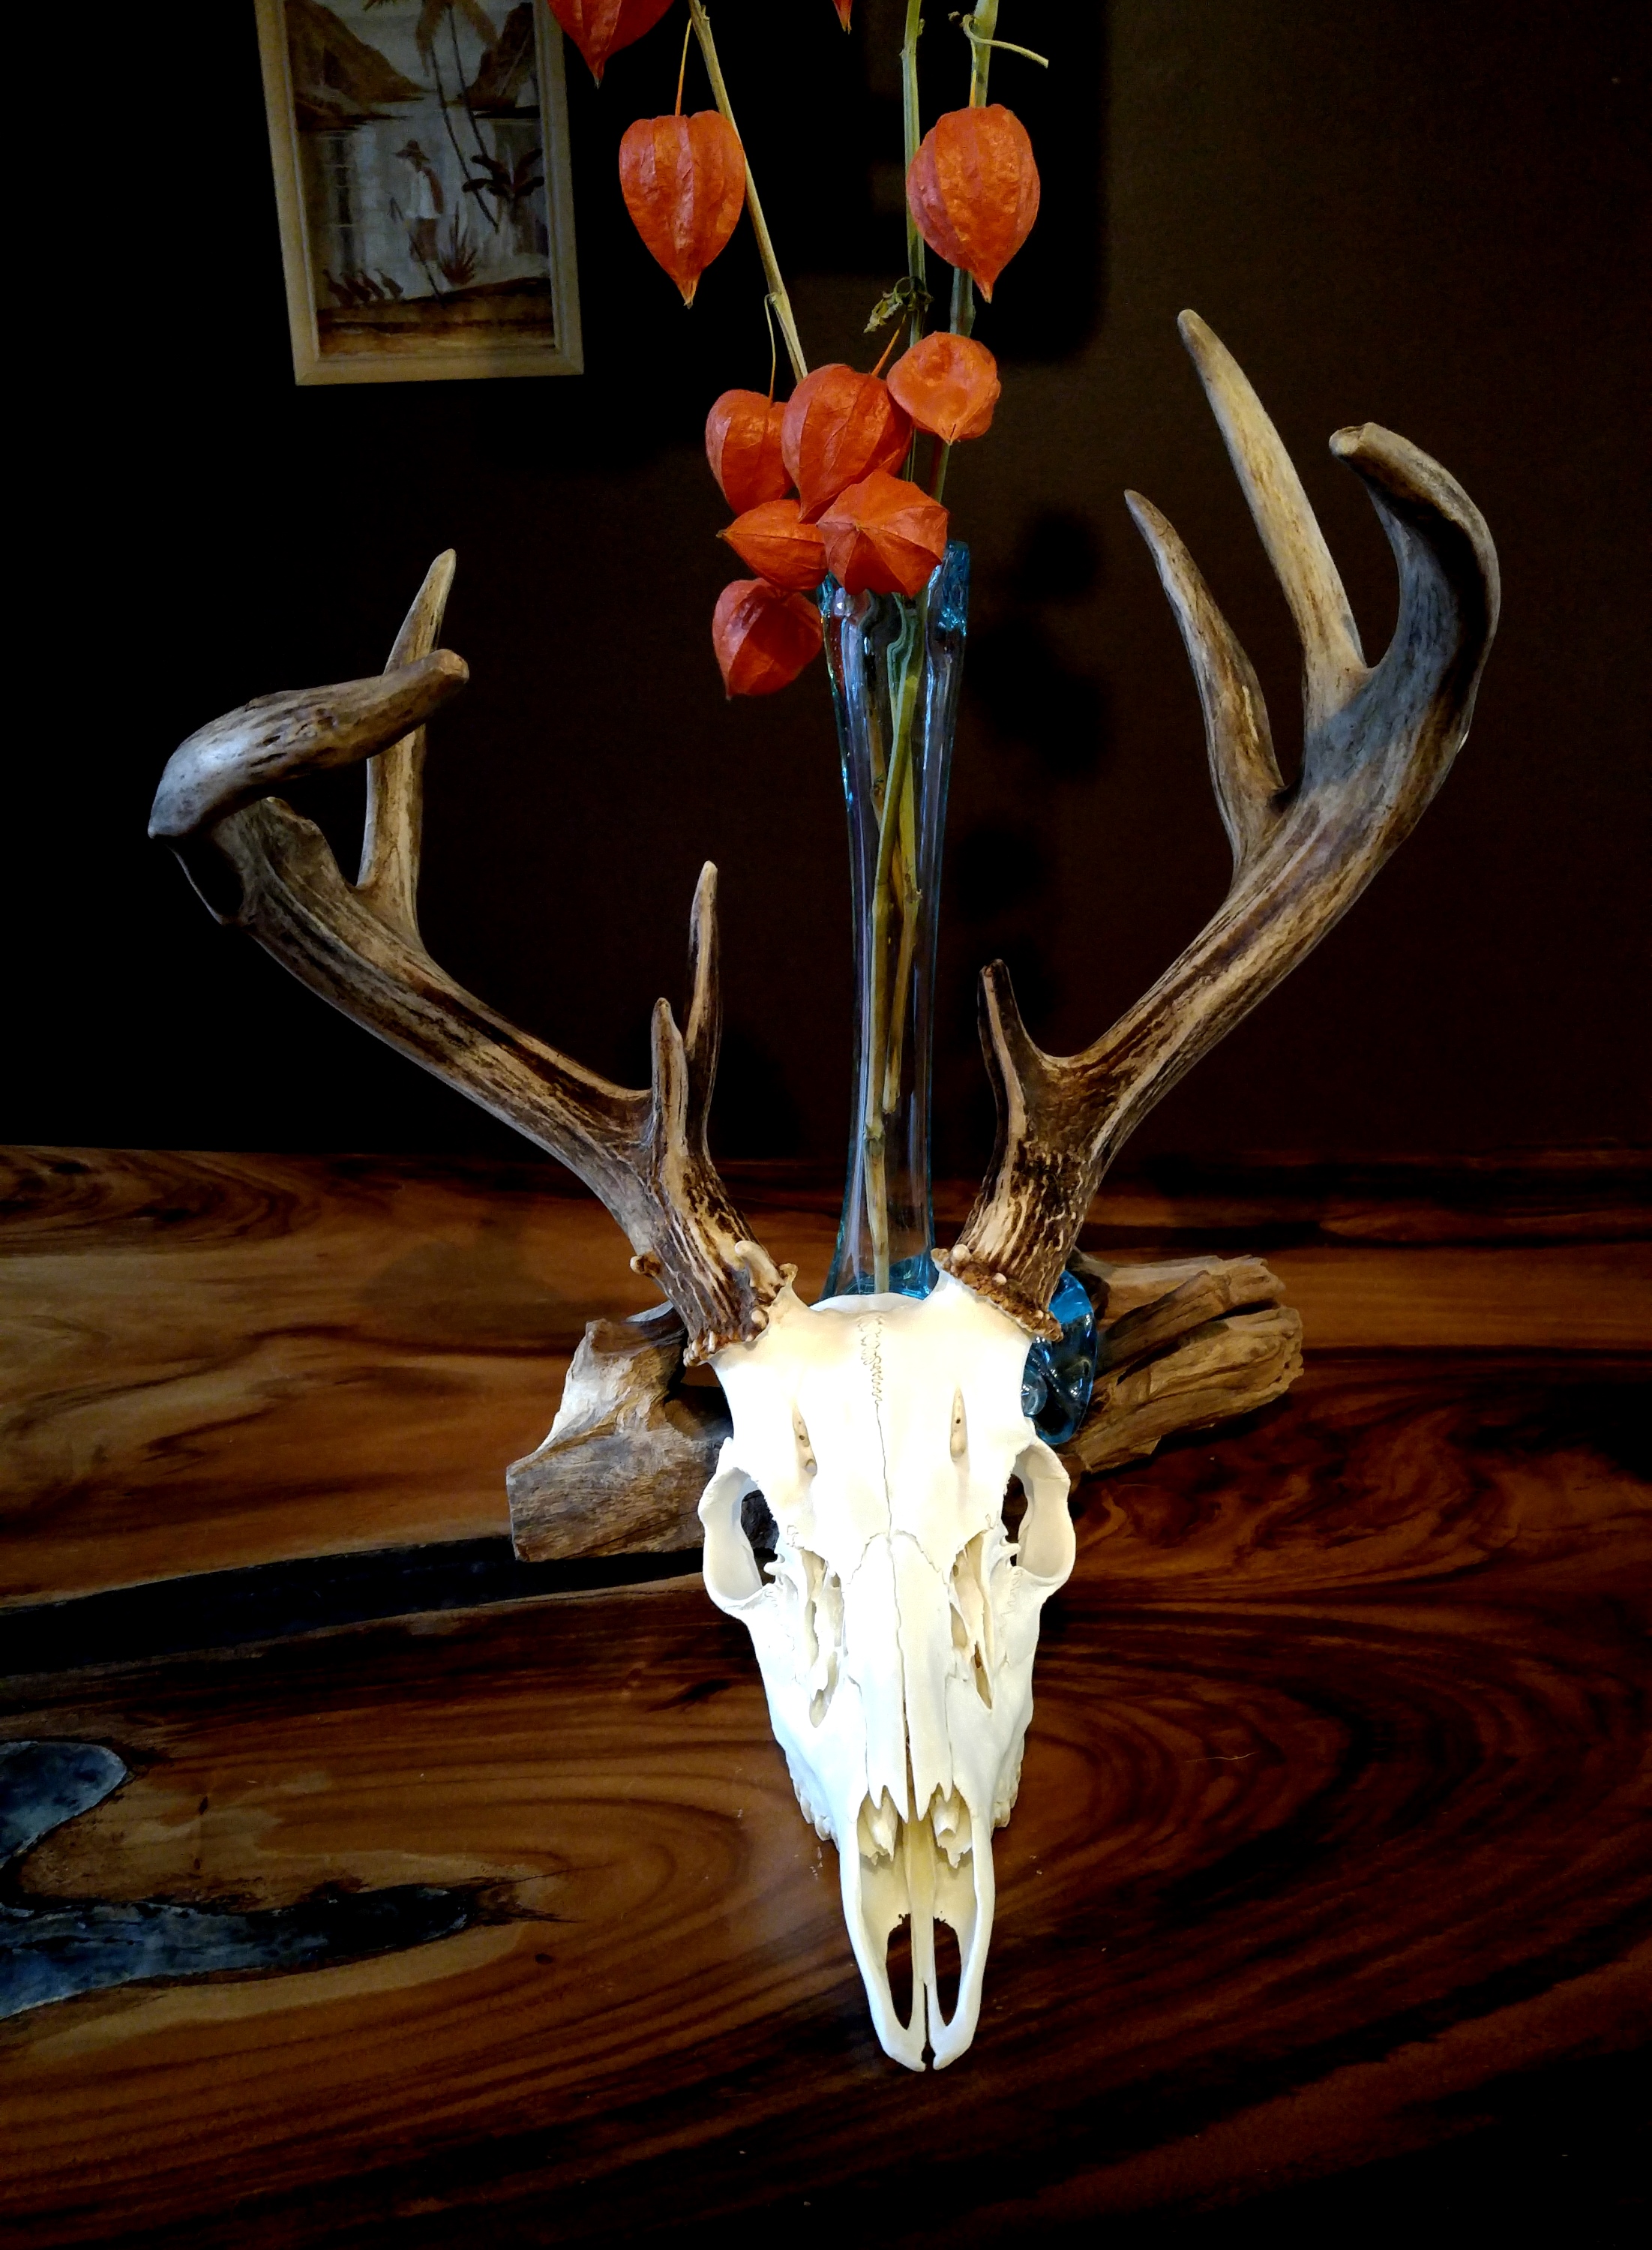
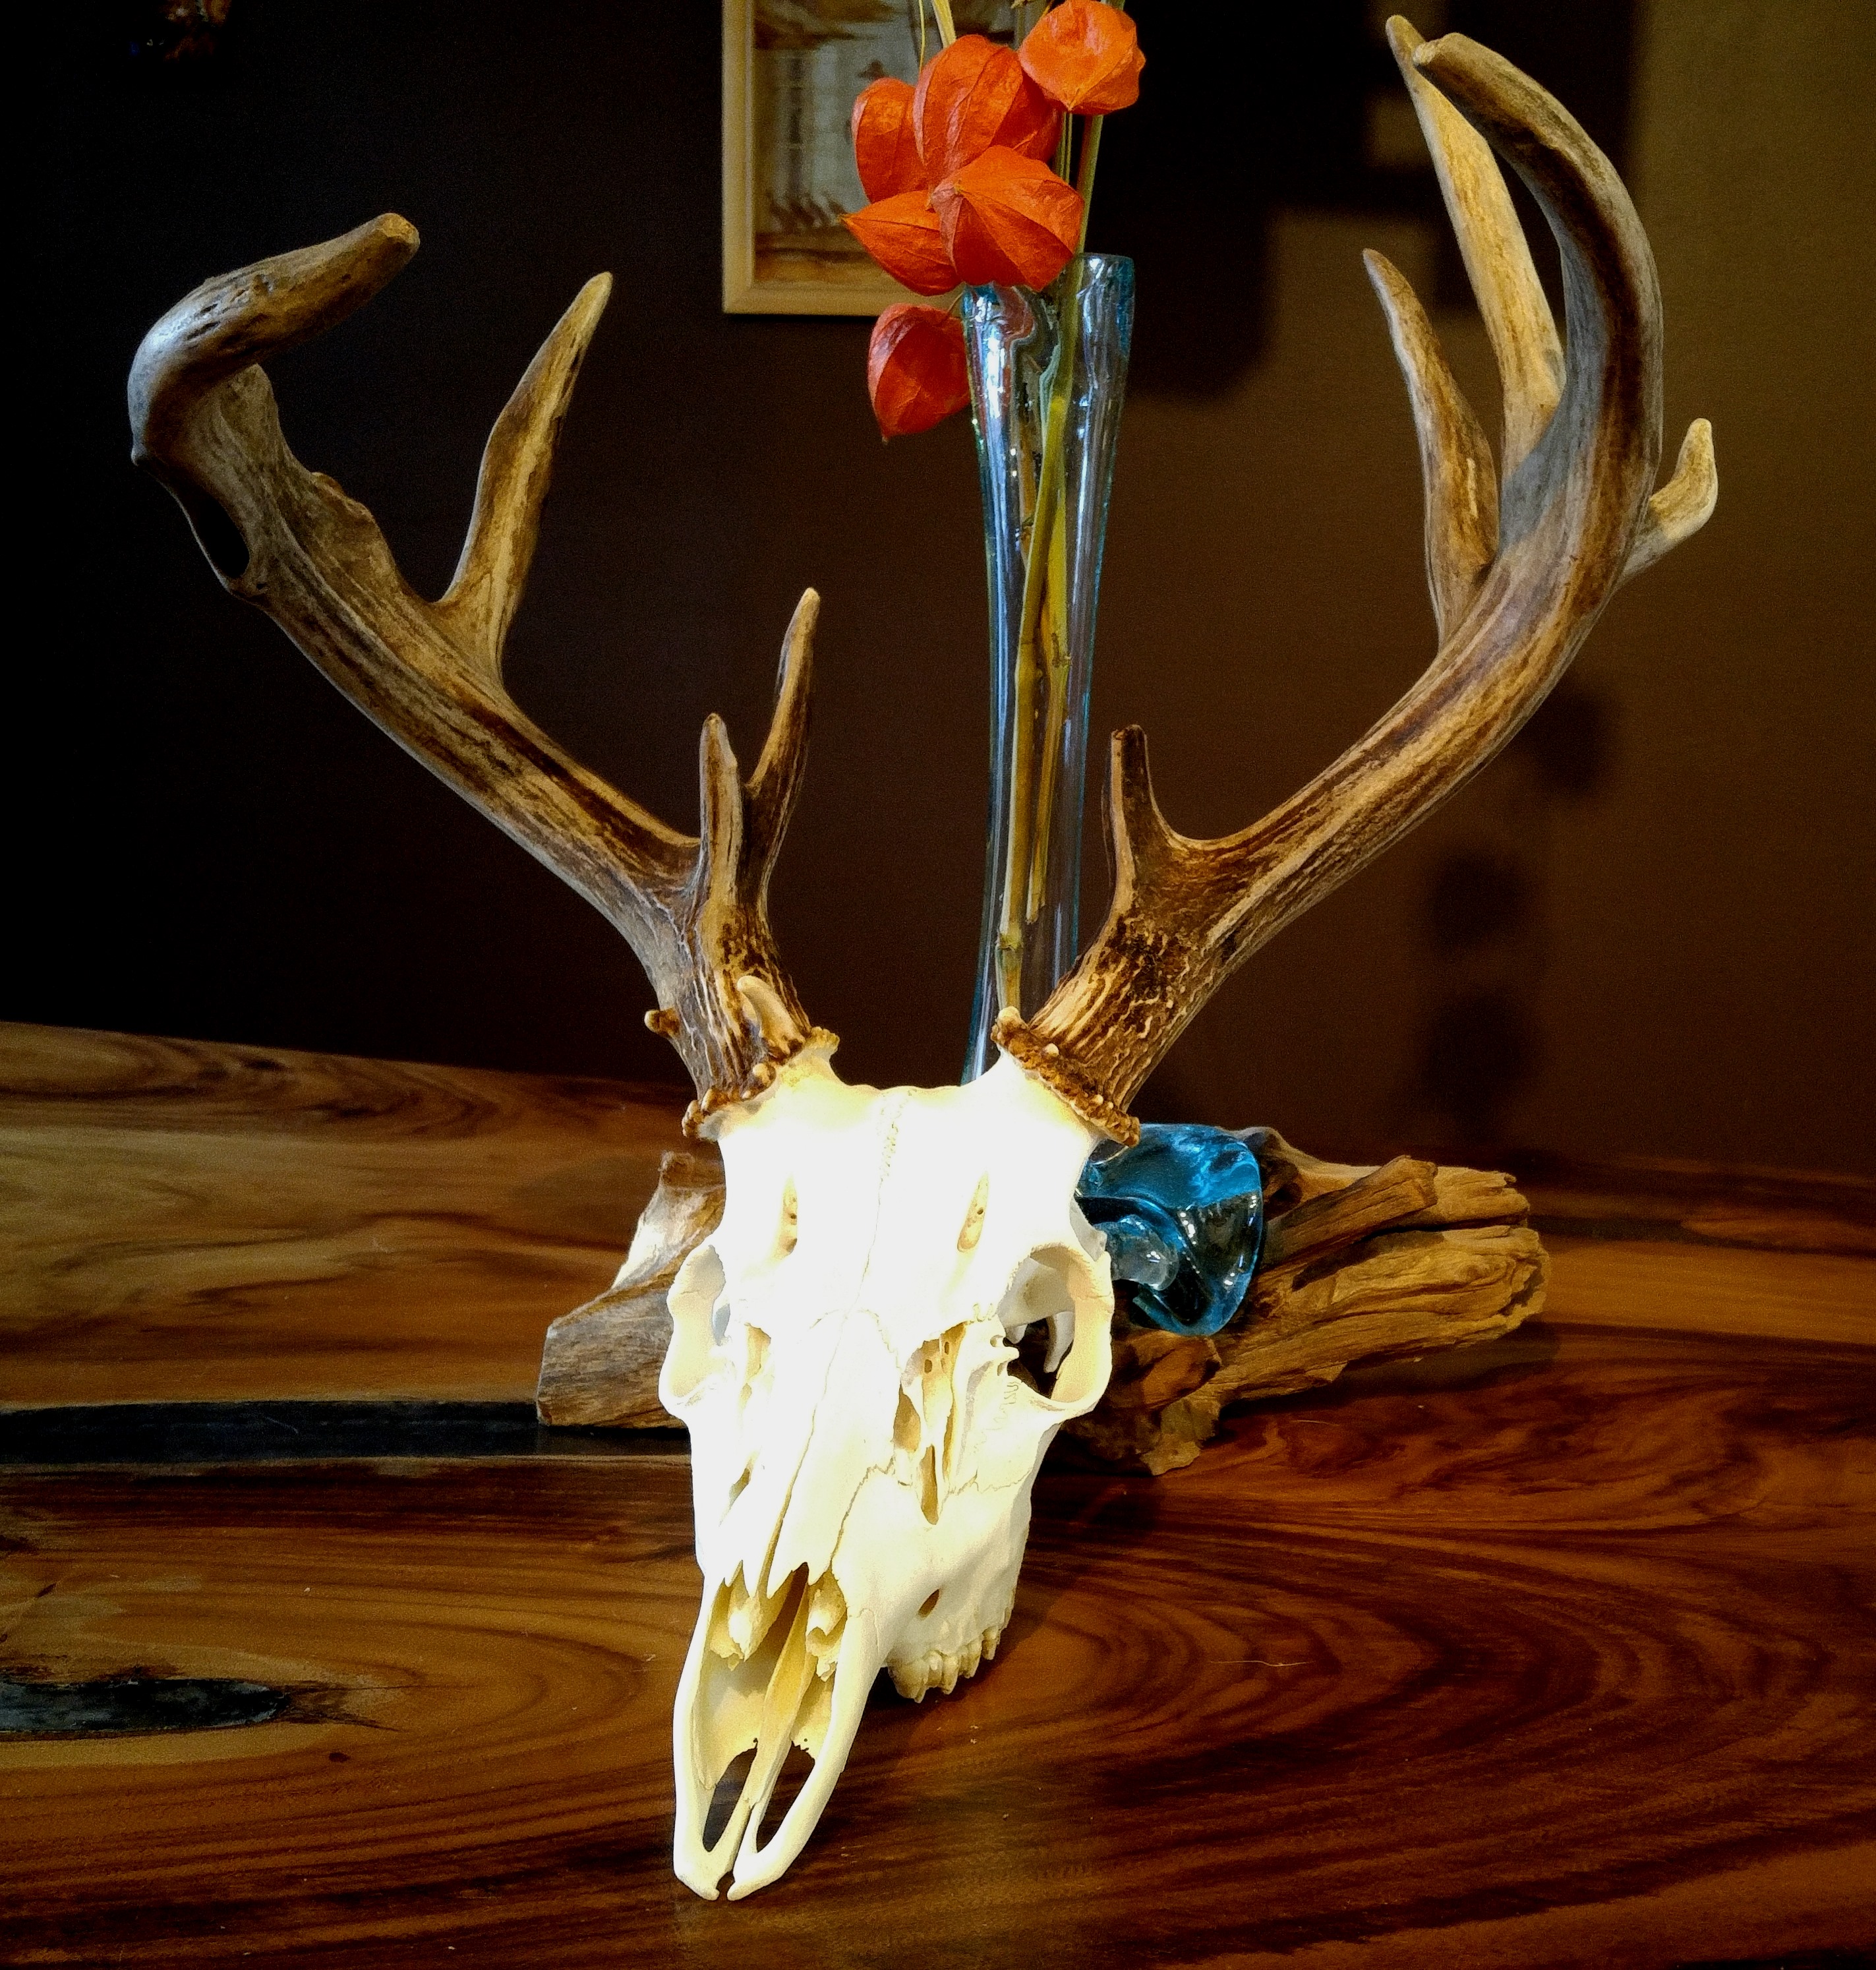
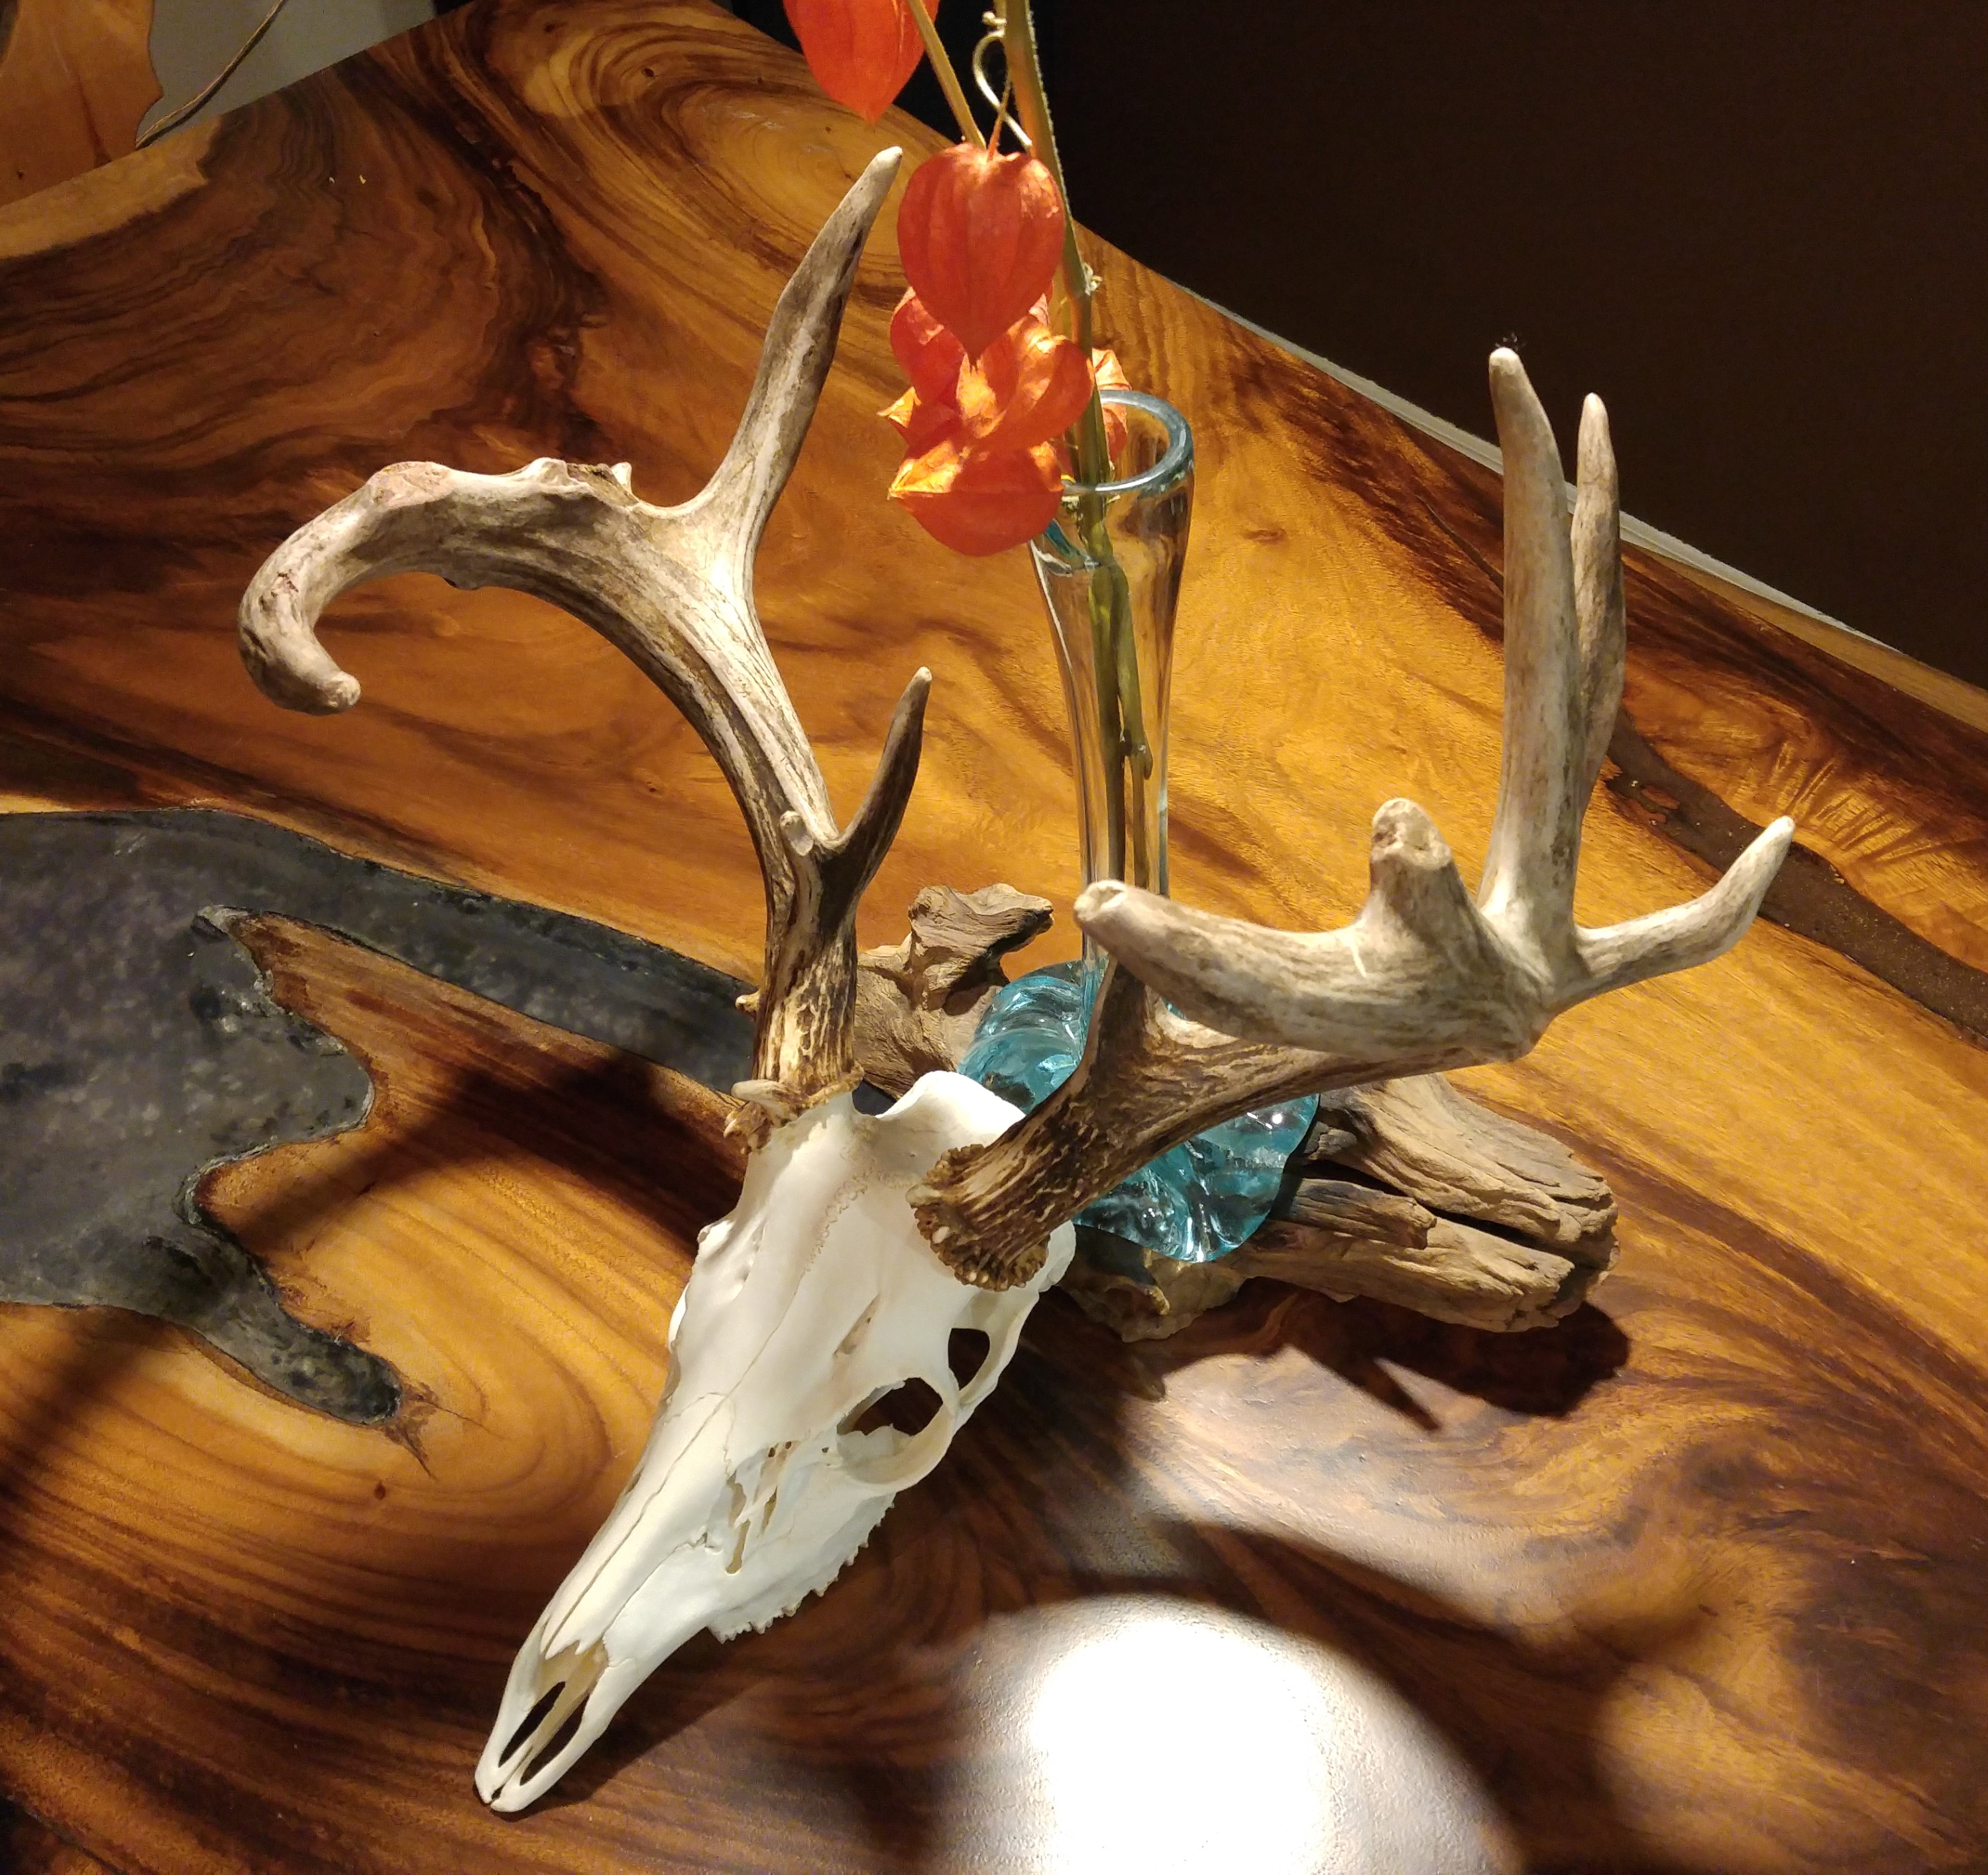
This year, Davis shot a whitetail buck with a fairly interesting rack with lots of broken tines and an abscess and I thought I would take the opportunity to learn how to turn it into a European/skull mount. Lucky for me my parents were in town for a visit and my dad was able to give me a hand.
I think it turned out really well for a first attempt and I definitely learned a few lessons to keep in mind for any future endeavours.
Click on images to enlarge.
Sadly I don’t have any pictures of the process, but here’s what we did.
The first step is to skin and de-flesh the head which is not as bad it sounds presuming that it hasn’t sat around for too long and gotten too funky.
The next step is to really clean up the skull and get all of the flesh, the brain, connective tissue and nerves out of all the nooks and crannies (and there are a lot of nooks and crannies in a skull). There are a few ways this can be accomplished, the most popular being:
- dermestid (flesh eating) beetles
- soaking in a highly caustic liquid
- or the most labour intensive solution; boiling and cleaning.
Arguably, dermestid beetles are the best method, however, I don’t have a colony of beetles sitting around and I didn’t want to spend a bunch of money having someone else make the mount.
I opted for boiling. We fired up the side burner on the barbecue (because this is a highly odoriferous process best done outside) and simmered the head, with the antlers kept out of the water, for about two hours with some dish soap to help de-grease the skull.
Next the head was removed from the water, tied to a pallet, and pressure washed. I made sure to be careful around the most delicate pieces like the sinus and turbinates. It’s a fine balance between blasting away the flesh, connective tissue, nerves etc and preserving the delicate bone structure. It’s also extremely messy and you should be fully prepared to have lots of skull matter splattered back at you.
After pressure washing I used a pick to remove some of the stubborn bits that were tucked into tight places, I then placed the head back into fresh water with some dish soap for another 1-2 hours of simmering.
I had planned to perform another round of pressure washing at this point but my hoses froze up so there would be no more pressure washing that day. That said, the skull came out of the second simmer looking very good.
Next the skull was submerged in a strong hydrogen peroxide solution to whiten the skull (making sure to keep the antlers out). The skull soaked in the hydrogen peroxide solution for around 15 hours by the time I was happy with the level of whiteness. If you’re using strong hydrogen peroxide, extreme caution is warranted, this stuff can spontaneously ignite if splashed on some fabrics.
Do not whiten skulls with bleach, it makes the bone brittle.
At this point the skull is ready for mounting. At the suggestion of a friend I purchased a skull hooker which is a very simple adjustable metal bracket designed to have a prong inserted into the base of the skull where the spinal cord used to be. No cutting or drilling or anything required. The other popular option is to create a wooden plaque.
All that’s left at this point is to optionally seal the skull somehow (probably a spray can of clear coat), and to find a spot on the wall that Janet will let me display this thing.
Lessons learned:
- the simmer could have been longer, or more vigorous, this is a balancing act as too much boiling is bad for the bone and will result in the teeth falling out.
- tie a piece of string around the nose while it’s drying to prevent the bones from separating
- don’t cut the spine too close to the skull or it might affect your mounting options (I was ok this time around but it was close).
I LOVE what you have done with the rack and skull of that deer Kyle!!! It is really a work of art, especially since the rack has so many quirky aspects to it. Thanks for the complete rundown of how you did it. It could go up on our wall if you like !! hahaha!
Thanks, I’m really happy with it and enjoyed learning something new. Truth be told, I might be hooked though I’m not sure that Janet will let me have a trophy room… Maybe I’ll make you one in the future 😉
Super interesting and it came out beautifully. (I enjoy reading about the process, but am glad that I won’t ever have to power wash brains off a skull 😉